• Custom chocolate molds allow for endless creativity in crafting unique confections.
  • Silicone molds are flexible and perfect for beginners.
  • Choose the right material based on your design complexity and durability needs.
  • Decorate your chocolates with edible paints and powders for a professional touch.
  • Store homemade chocolates in a cool, dry place to maintain freshness.

There's something magical about crafting chocolate into unique shapes that capture the imagination and tantalize the taste buds. Whether you're looking to create personalized gifts, professional-looking confections for a business, or simply want to experiment with chocolate crafting at home, making your own chocolate molds is a delightful way to express creativity and enjoy the versatility of chocolate. In this guide, you'll learn the ins and outs of creating custom molds that will take your chocolate creations to the next level.

Understanding the Basics of Chocolate Molding

Before diving into mold-making, it's essential to grasp why quality molds are crucial for health-boosting chocolate creations. Molds determine not just the appearance but also the texture and release of your chocolates. They come in various materials like silicone, plastic, and polycarbonate, each offering different benefits. Silicone molds are flexible and easy to use, perfect for beginners. Plastic molds are cost-effective but may lack durability. Polycarbonate molds are professional-grade, known for their ability to create sharp, glossy chocolates.

Selecting the Right Materials for Your Custom Molds

When creating custom molds, selecting suitable materials is paramount for achieving desired results. Food-grade silicone is often recommended due to its flexibility and non-stick properties. It can withstand low and high temperatures, making it ideal for mastering the art of truffle making. Other materials like food-safe epoxy or certain types of plastic can also be used if they comply with safety standards.

Choosing the Right Material for DIY Chocolate Molds

Illustration of silicone, plastic, and polycarbonate chocolate molds
Understand the Types of Mold Materials
Before you begin making chocolate molds, it's important to understand the different materials available. The most common materials for DIY chocolate molds are silicone, plastic, and polycarbonate. Silicone molds are flexible, non-stick, and can withstand a wide range of temperatures, making them ideal for beginners. Plastic molds are less expensive but may not be as durable as silicone or polycarbonate. Polycarbonate molds are rigid and professional-grade, offering a glossy finish to your chocolates.
Comparison of simple and complex chocolate mold designs
Consider the Complexity of Your Design
The complexity of your chocolate mold design will influence the type of material you should choose. Simple designs with basic shapes can be easily achieved with any mold material. However, intricate designs with fine details or undercuts are best suited for silicone molds due to their flexibility and ease of demolding.
Durable silicone and polycarbonate molds versus a plastic mold
Evaluate the Durability and Reusability
If you plan to make chocolates frequently, it's important to consider the durability and reusability of the mold material. Silicone and polycarbonate molds are highly durable and can be used many times without losing their shape or quality. Plastic molds may wear out faster and typically do not last as long as silicone or polycarbonate options.
Food-grade certification logos on chocolate mold packaging
Check for Food-Grade Certification
Safety is paramount when making food-related items. Ensure that the material you choose is certified food-grade. This means it is safe for contact with food and will not leach harmful chemicals into your chocolates. Look for the FDA or LFGB certification on the packaging or in the product description.
Cleaning silicone, polycarbonate, and plastic chocolate molds
Factor in the Ease of Cleaning
Post-chocolate making, cleaning the molds is a necessary step. Silicone molds are often dishwasher safe and easy to clean due to their flexibility. Polycarbonate molds require careful handling and are usually cleaned with mild soap and warm water. Plastic molds can warp if exposed to high temperatures, so check if they are dishwasher safe or if they need to be hand-washed.
Price tags on silicone, plastic, and polycarbonate chocolate molds
Think About Your Budget
Your budget will also play a role in the material you choose for your chocolate molds. Plastic molds are generally the most affordable, followed by silicone, with polycarbonate being the most expensive but also the most professional. Consider how much you're willing to invest and how often you'll be using the molds to determine the most cost-effective material for your needs.

In addition to choosing the right material, having a clear idea of your design is essential. Consider whether you want intricate patterns or simple shapes; this will influence both your material choice and the method you use to create your mold.

Crafting Your Mold Design

Designing your mold is where creativity truly shines. You might start with a sketch or use computer software to create a precise template. If you're looking for inspiration or guidance on designing effective mold patterns that translate well into chocolate form, exploring our comprehensive guide on creating culinary wonders with chocolate molds can be incredibly helpful.

Mold Design Tools

  1. 3D modeling software for chocolate molds
    3D Modeling Software - Utilize programs like Blender or SketchUp to create precise chocolate mold designs.
  2. chocolate mold making kit
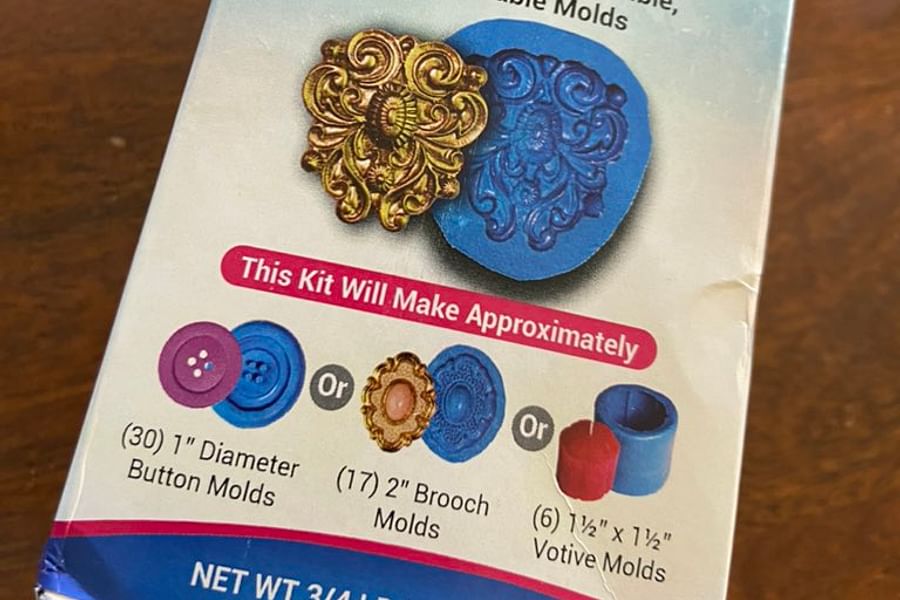
    Chocolate Mold Kits - Purchase kits that include various shapes and patterns to start your mold-making journey.
  3. food grade silicone plastique for molds
    Silicone Plastique - Use food-grade silicone compounds to make flexible, custom molds from your designs.
  4. laser engraving machine for chocolate molds
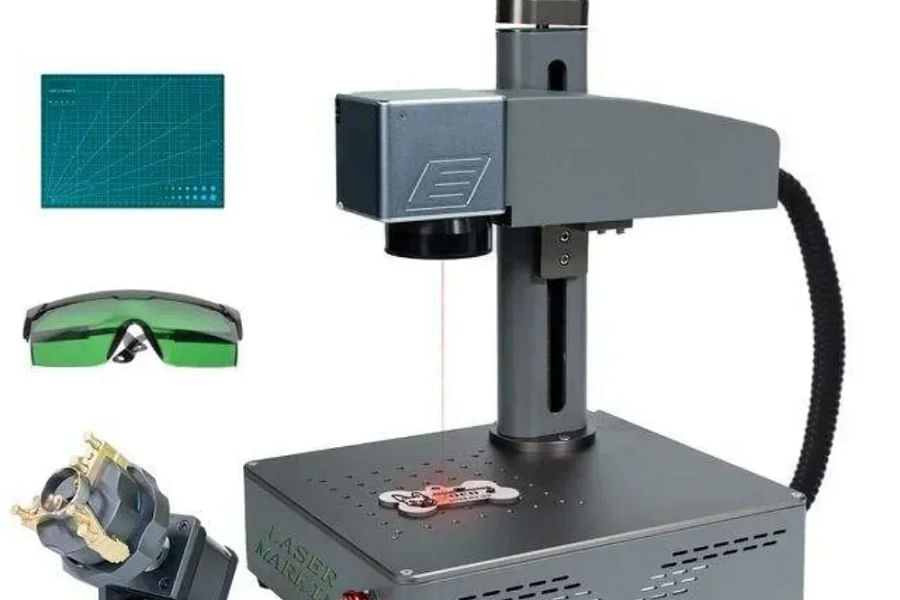
    Engraving Machine - For intricate designs, a laser engraver can carve patterns into mold-making materials.
  5. precision thermometer for mold making
    Thermometer - Ensure your molding material sets correctly by monitoring the temperature with a precise thermometer.
  6. chocolate mold making tutorials
    Mold Making Tutorials - Watch online tutorials from experts to learn the best techniques for custom mold creation.
  7. chocolate pattern transfer sheets
    Pattern Transfer Sheets - Use these to imprint designs onto your chocolate creations as they set.
  8. carving tools for chocolate molds
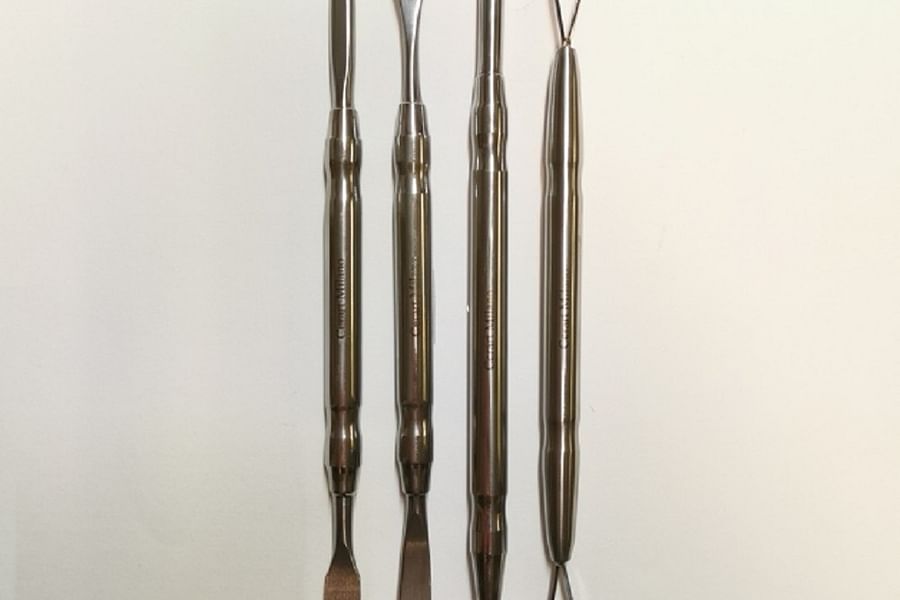
    Carving Tools - Hand-carve your own designs into moldable materials for a truly artisan touch.
  9. food safe 3D printer for chocolate molds
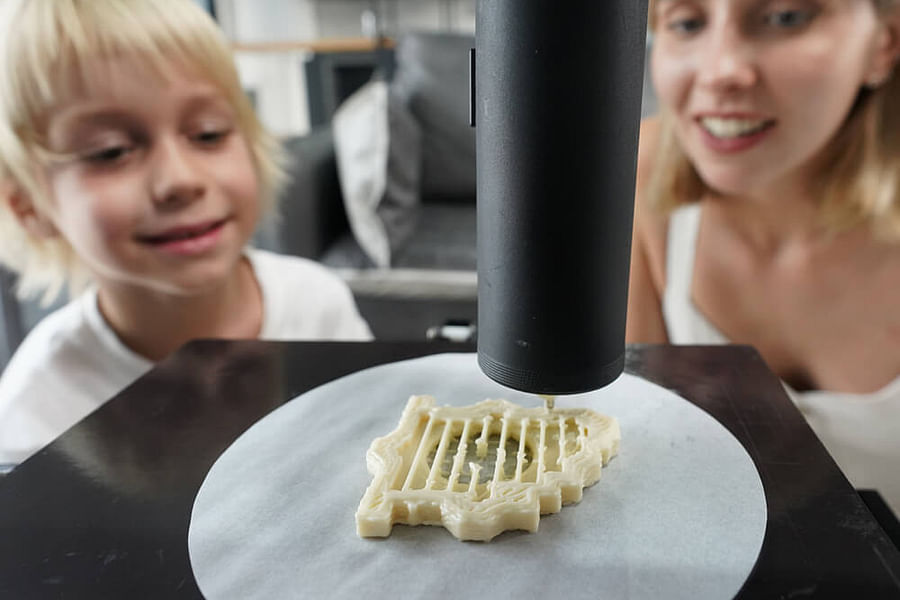
    3D Printer - Print your digital designs into physical molds with a 3D printer capable of handling food-safe materials.
  10. chocolate design inspiration books
    Design Inspiration Books - Get inspired by chocolate design books filled with patterns and ideas for your next creation.

Once you have a design in mind, it's time to bring it into the physical world. This could involve sculpting a prototype by hand from clay or other sculptable material from which you'll later create your mold.

The Process of Making Your Own Chocolate Mold

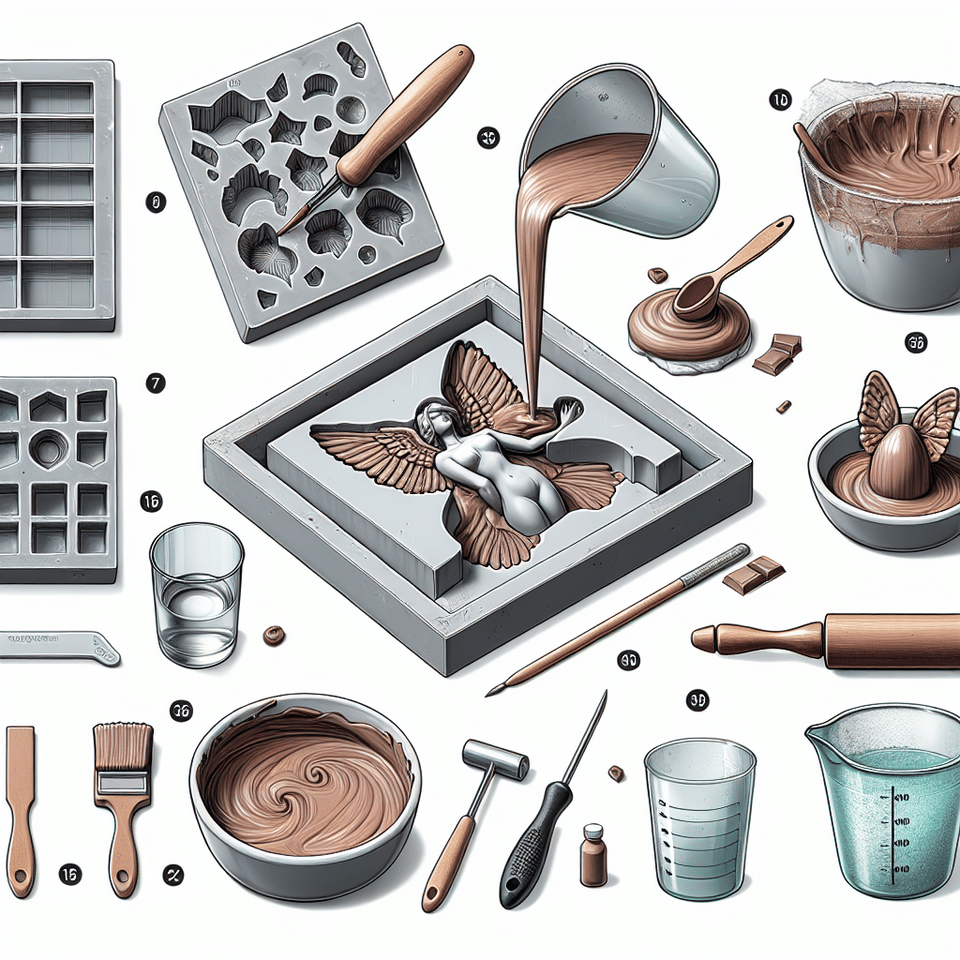
Making your own mold might seem daunting at first glance but fear not! The process can be quite straightforward with proper guidance. You'll begin by creating a master model—your prototype—of what you want your finished chocolates to look like. From there, you'll cast your mold using silicone or another chosen material by pouring it around your master model.

DIY Silicone Chocolate Molds

You will need:

  • object to make mold fromMaster model
  • silicone mold-making kit
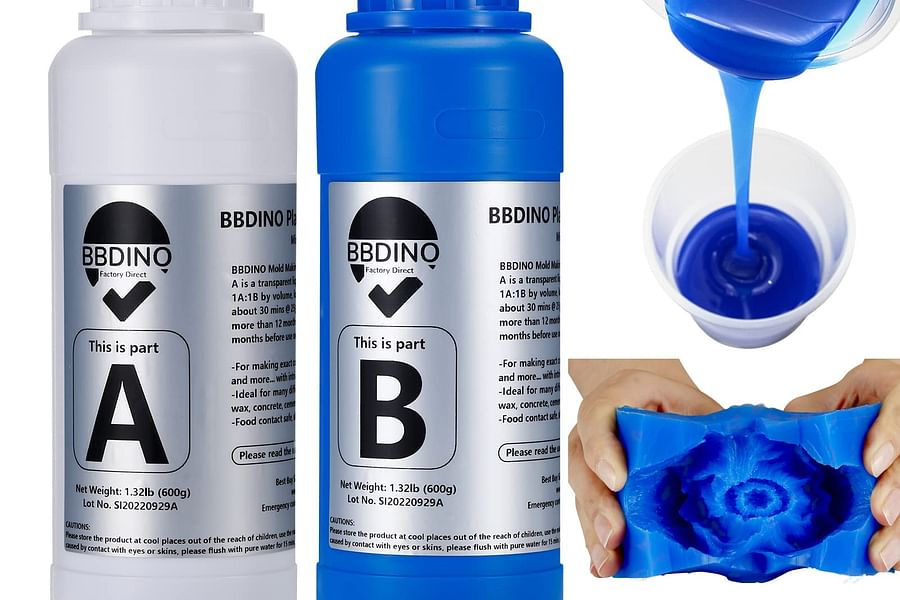
Silicone mold-making kit
  • plastic mixing cupsMixing cups
  • stir sticksStirring sticks
  • disposable glovesGloves
  • digital scale for measuringScale
  • molding box frameBox or frame
  • non-stick cooking sprayNon-stick cooking spray or petroleum jelly

Instructions

  1. Start by cleaning your master model thoroughly.
  2. Prepare the molding box or frame where the master will be placed.
  3. Apply a thin coat of non-stick spray or petroleum jelly to the master model.
  4. Mix the silicone components according to the kit instructions.
  5. Pour the silicone over the master model in the box.
  6. Allow the silicone to cure as per the kit's specified time.
  7. Remove the hardened silicone mold from the box.
  8. Carefully extract the master model from the silicone mold.

Notes

Always work in a well-ventilated area when handling silicone. The exact mixing ratios and curing times can vary between silicone kits, so always follow the instructions provided with your specific product. If you encounter any bubbles on the surface of your master model, you can use a toothpick to pop them before the silicone sets. For complex models with undercuts, consider using a two-part mold-making process.

This process allows for endless customization options—you can imprint personal logos, write names or messages, or replicate any shape that captures your fancy. Once set and cured properly according to manufacturer instructions (which usually involves leaving it undisturbed in a cool place), your homemade mold is ready for use.

Incorporating homemade molds into DIY truffle recipes or other chocolate endeavors adds an element of personal touch that can't be matched by store-bought varieties. It's not only about aesthetics; it's about creating an experience that resonates personally with each bite.

Mastering Chocolate Molds

Think you've got the sweet skills to make your own chocolate molds? Put your knowledge to the test with our interactive quiz!

Stay tuned as we delve further into techniques for filling and using these custom-made wonders in part two of this article where we will explore advanced tips for perfecting homemade chocolates using your new molds!

Choosing the Right Material for Your Chocolate Mold

When it comes to creating your own chocolate molds, the material you choose is paramount. The most popular options include silicone, plastic, and polycarbonate. Each material has its own set of benefits. Silicone molds are flexible, non-stick, and can withstand a wide range of temperatures, making them ideal for beginners. Plastic molds are cost-effective and offer a variety of shapes and sizes. Polycarbonate molds, while on the pricier side, provide a professional finish with their rigid structure and glossy interior.

Understanding the nuances of each material can elevate your chocolate creations from homemade to artisanal quality. For inspiration on selecting the perfect mold for your project, consider browsing through our comprehensive guide on creating culinary wonders with chocolate molds.

What's Your Go-To Material for Chocolate Molds?

When you're crafting those sweet treats, which mold material makes your heart (and chocolate) melt?

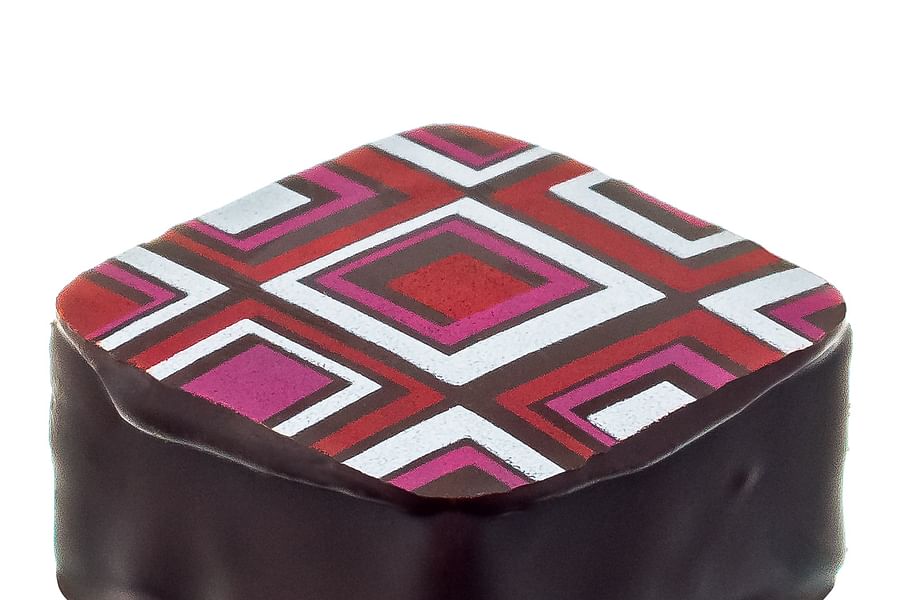
Decorating Your Chocolates Post-Molding

Once you've crafted your chocolates using custom molds, adding decorative touches can transform them into true masterpieces. Techniques such as painting with colored cocoa butter or dusting with edible glitter can add visual appeal to your treats. If you're looking to infuse some health benefits into your chocolates while decorating, consider using superfood powders like matcha or acai for a colorful yet nutritious finish.

To learn more about enhancing both the aesthetic and nutritional value of your chocolates, dive into our guide on crafting your own health-boosting chocolate.

Decorating Your Chocolates with Edible Paints and Powders

chocolate decorating materials on a table
Gather Your Materials
Before you begin decorating your chocolates, assemble all necessary materials. You'll need your chocolate creations, edible paints and powders, fine-tipped paintbrushes, and a clean workspace.
clean and organized chocolate decorating workspace
Prepare Your Workspace
Ensure your workspace is clean, well-lit, and free of any contaminants. Lay down parchment paper or a silicone mat to protect the surface and make cleanup easier.
practicing chocolate decoration techniques on parchment paper
Practice Your Technique
If you're new to using edible paints and powders, practice on parchment paper first. Experiment with different brush strokes and powder applications to get a feel for the materials.
applying edible paint to chocolate with a fine-tipped brush
Apply Edible Paints
Dip your fine-tipped brush into the edible paint. Gently apply the paint to your chocolate mold creations, using light strokes to create designs or add details. Allow the paint to dry before adding additional colors.
brushing edible shimmer powder onto chocolate
Use Edible Powders for Shimmer
For a shimmering effect, use a clean, dry brush to apply edible powder to your chocolates. You can highlight edges, create gradients, or cover entire surfaces for a metallic or pearlescent finish.
combining edible paints and powders on chocolate
Combine Paints and Powders
Get creative by combining paints and powders. Apply a base layer of paint and, while it's still slightly tacky, gently dust on the powder to adhere it. This technique can add depth and complexity to your designs.
finished decorated chocolates setting
Let Your Chocolates Set
Once you've finished decorating, allow your chocolates to set completely. This will ensure the paints and powders adhere properly and the designs remain intact.
decorated chocolates on display
Store or Display Your Chocolates
After the decorations have set, store your chocolates in a cool, dry place or arrange them for display. If gifting, consider using clear packaging to showcase your custom designs.

Storing and Preserving Your Chocolate Creations

Proper storage is critical in preserving the taste and texture of your chocolate creations. Chocolate should be kept in a cool, dry place away from direct sunlight. If you're not planning to consume your chocolates right away, consider wrapping them tightly in foil or plastic wrap to prevent moisture and other contaminants from affecting their quality.

If you're interested in learning more about how to keep your homemade chocolates fresh for longer periods, our article on creating chocolate-dipped delights provides valuable insights on storage techniques.

Storing Homemade Chocolates: Tips and Tricks

How should I store my homemade chocolate creations to ensure freshness?
To maintain the freshness of your homemade chocolates, store them in a cool, dry place at a consistent temperature, ideally between 60-70°F (15-21°C). Avoid any exposure to direct sunlight, and keep them away from any sources of heat. If you're in a warmer climate, consider storing your chocolates in the refrigerator. However, make sure to wrap them tightly in cling film or an airtight container to prevent the absorption of odors and condensation which can spoil the texture and flavor.
🏠
Can I freeze my homemade chocolate molds for later use?
Yes, you can freeze homemade chocolate molds, but it requires careful handling. Wrap your chocolates in aluminum foil and place them in an airtight container or a sealable freezer bag. When you're ready to enjoy them, thaw the chocolates in the refrigerator for several hours before bringing them to room temperature. This gradual process helps prevent condensation and sugar bloom, ensuring your chocolates maintain their quality and taste.
❄️
How long can I keep homemade chocolates before they go bad?
The shelf life of homemade chocolates can vary depending on the ingredients used. Generally, chocolates with a higher cocoa content and without dairy or fillings can last up to several months when stored properly. However, chocolates with fresh fillings, such as cream or fruit, should be consumed within a week. Always check for any changes in appearance or smell, which can indicate that the chocolate is no longer good to eat.
Is it necessary to refrigerate chocolates with different fillings?
Chocolates with perishable fillings, such as fresh cream, fruit, or dairy, should be refrigerated to prevent spoilage. Store them in an airtight container to keep out moisture and odors. For chocolates with non-perishable fillings like nuts or caramel, refrigeration isn't necessary as long as they're kept in a cool, dry place. However, if you're in a hot and humid environment, refrigeration may help maintain their quality.
🍫
What is the best way to package homemade chocolates for gifting?
When gifting homemade chocolates, presentation is key. Choose a package that not only looks appealing but also protects the chocolates. Use candy cups to separate individual pieces and place them in a sturdy box or tin. If possible, include a cool pack during warmer seasons to prevent melting. Wrap the box with a ribbon for a festive touch and include a note with storage instructions to help your recipient enjoy the chocolates at their best.
🎁

As we explore the world of custom chocolate mold creation together, remember that practice makes perfect. Don't be discouraged by initial imperfections; instead, view them as stepping stones towards mastering this delightful craft. To test your knowledge and skills in making truffle chocolates using custom molds, take our interactive Chocolate Truffle Making Quiz. And if you're looking for delicious recipes to fill those molds with delectable ganache centers, be sure to check out our Classic Truffle Chocolates Recipe.

Making your own chocolate molds allows for endless creativity in crafting unique confections that reflect personal tastes or celebrate special occasions. Whether it's a passion project or a professional endeavor, these custom creations are sure to impress.

To continue refining your chocolatier skills further explore recipes like our beloved DIY Chocolate Truffle Recipe, or understand complex techniques through our Mastering the Art of Homemade Truffles with Cocoa Powder. The journey through the artistry of chocolate is rich with possibilities—embrace it and let creativity be your guide.

"The art of chocolatiering is not just about making sweets; it's about crafting moments of joy and creating edible works of art that resonate with both taste buds and emotions."

Recommended Products

Cake Pop Maker Kit with 2 Silicone Mold Sets with 3 Tier Cake Stand, Chocolate Candy Melts Pot, Silicone Cupcake Molds, Paper Lollipop Sticks, Decorating Pen with 4 Piping Tips, Bag and Twist Ties Our Recommendation
Cake Pop Maker Kit with 2 Silicone Mold Sets with 3 Tier Cake Stand, Chocolate Candy Melts Pot, Silicone Cupcake Molds, Paper Lollipop Sticks, Decorating Pen with 4 Piping Tips, Bag and Twist Ties
4.3 (3035+ Reviews)
$29.96 Prime Eligible
Cake Pop Maker Kit 618Pcs with 5 Silicone Mold Sets - 3 Tier Display Stand, Chocolate Candy Melting Pot,Piping Tips and Coupler, Measuring Cup, Muffin Cupcakes, Decorating Pen, Lollipop Sticks Our Recommendation
Cake Pop Maker Kit 618Pcs with 5 Silicone Mold Sets - 3 Tier Display Stand, Chocolate Candy Melting Pot,Piping Tips and Coupler, Measuring Cup, Muffin Cupcakes, Decorating Pen, Lollipop Sticks
4.4 (93+ Reviews)
$39.99 Prime Eligible
Cocoa Bomb Molds, Set Chocolate Bomb Making Kit, 2" & 2 1/2" Molds, Semi Sphere 6 Hole Mold Silicone, 4 Silicone Molds at 2 Sizes, 8 Tools for Chocolate Bomb, Cake, Dome Jelly Our Recommendation
Cocoa Bomb Molds, Set Chocolate Bomb Making Kit, 2" & 2 1/2" Molds, Semi Sphere 6 Hole Mold Silicone, 4 Silicone Molds at 2 Sizes, 8 Tools for Chocolate Bomb, Cake, Dome Jelly
4.6 (339+ Reviews)
$21.99 Prime Eligible
homEdge Break-Apart Chocolate Molds, Set of 4 Packs Food Grade Non-Stick Silicone Protein and Energy Bar Molds Our Recommendation
homEdge Break-Apart Chocolate Molds, Set of 4 Packs Food Grade Non-Stick Silicone Protein and Energy Bar Molds
4.6 (4896+ Reviews)
$9.99 Prime Eligible
Flower Silicone Mold,7 Pack for Rose, Chocolate, Cake, Butterfly, Mini Bow, Cupcake, Jelly, Mini Muffins and Candy Making Our Recommendation
Flower Silicone Mold,7 Pack for Rose, Chocolate, Cake, Butterfly, Mini Bow, Cupcake, Jelly, Mini Muffins and Candy Making
4.7 (606+ Reviews)
$7.99 Prime Eligible
Chocolate Molds, Rectangle Chocolate Bar Sweet Molds Silicone Bakeware Wax Melt Molds, Pack of 1 Our Recommendation
Chocolate Molds, Rectangle Chocolate Bar Sweet Molds Silicone Bakeware Wax Melt Molds, Pack of 1
4.7 (1539+ Reviews)
$6.98 Prime Eligible
Silicone Molds Non-stick Chocolate Candy Mold,Soap Molds,Silicone Baking mold Making Kit, Set of 3 Forest Theme with Different Shapes Animals,Lovely & Fun for Kids Our Recommendation
Silicone Molds Non-stick Chocolate Candy Mold,Soap Molds,Silicone Baking mold Making Kit, Set of 3 Forest Theme with Different Shapes Animals,Lovely & Fun for Kids
4.7 (820+ Reviews)
$9.99 Prime Eligible
Mushroom Candy Mold, 2 Pack Our Recommendation
Mushroom Candy Mold, 2 Pack
4.8 (96+ Reviews)
$12.95 Prime Eligible
454Pcs Cake Pop Maker Kit - Silicone Cake Pop Set with 3 Tier Cake Pop Stand, Cake Pop Molds, Chocolate Candy Melting Pot, Lollipop Sticks and Decorating Pen - Kids Baking Gifts Set for Kids Our Recommendation
454Pcs Cake Pop Maker Kit - Silicone Cake Pop Set with 3 Tier Cake Pop Stand, Cake Pop Molds, Chocolate Candy Melting Pot, Lollipop Sticks and Decorating Pen - Kids Baking Gifts Set for Kids
4.5 (289+ Reviews)
$36.97 Prime Eligible
4 Packs Silicone Molds for Chocolate, Food Grade no-stick Baking, candy and butter Mold with different shape Our Recommendation
4 Packs Silicone Molds for Chocolate, Food Grade no-stick Baking, candy and butter Mold with different shape
4.6 (644+ Reviews)
$10.99 Prime Eligible
Silicone Plastique DIY Silicone Mold Making Kit, Super Easy 1:1 Mix Putty, 3/4 Lb, Makes Strong, Reusable Silicone Molds, Food Grade, Non-Toxic, for Chocolate, Candy, Fondant, Resin, Plaster, Soap Our Recommendation
Silicone Plastique DIY Silicone Mold Making Kit, Super Easy 1:1 Mix Putty, 3/4 Lb, Makes Strong, Reusable Silicone Molds, Food Grade, Non-Toxic, for Chocolate, Candy, Fondant, Resin, Plaster, Soap
4.4 (1180+ Reviews)
$24.95 Prime Eligible
Chocolate Bar Molds, Silicone Snap Bars Making Kit, Break Apart Candy Mould Set, BPA Free Soy Candle Wax Melt Durable Mold Square Easy Release Non-Stick for Protein and Energy DIY Handmade Gifts Our Recommendation
Chocolate Bar Molds, Silicone Snap Bars Making Kit, Break Apart Candy Mould Set, BPA Free Soy Candle Wax Melt Durable Mold Square Easy Release Non-Stick for Protein and Energy DIY Handmade Gifts
4.8 (39+ Reviews)
$7.99 Prime Eligible
Hot Cocoa Bombs and Chocolate Bar Making Kit | A Do It Yourself Kit For Making Custom Hot Cocoa Bombs And Chocolate Bars At Home | Ages 13+ | Easy and Fun | Instructions Booklet Included Our Recommendation
Hot Cocoa Bombs and Chocolate Bar Making Kit | A Do It Yourself Kit For Making Custom Hot Cocoa Bombs And Chocolate Bars At Home | Ages 13+ | Easy and Fun | Instructions Booklet Included
5 (5+ Reviews)
$26.99 Prime Eligible
Chocolate Bar Molds Silicone Classic 4 Pack, Snap Candy Bars Making Kit Fondant Mould Set, BPA Free Soy Candle Wax Melt Durable Mold Easy Release Non-Stick for Protein and Energy DIY Handmade Gifts Our Recommendation
Chocolate Bar Molds Silicone Classic 4 Pack, Snap Candy Bars Making Kit Fondant Mould Set, BPA Free Soy Candle Wax Melt Durable Mold Easy Release Non-Stick for Protein and Energy DIY Handmade Gifts
4.5 (1710+ Reviews)
$9.99 Prime Eligible
Paris Hilton Breakable Chocolate Heart Kit, Includes Big and Small Heart Shaped Molds, Number, Character and Letter Molds, Mini Wooden Hammers, Candy Making Set, Pink Our Recommendation
Paris Hilton Breakable Chocolate Heart Kit, Includes Big and Small Heart Shaped Molds, Number, Character and Letter Molds, Mini Wooden Hammers, Candy Making Set, Pink
4.6 (52+ Reviews)
$19.99 Prime Eligible
BBDINO Silicone Mold Making Kit, Super Elastic Mold Making Silicone Rubber, Liquid Silicone for Mold Making, N.W. 21.16 oz, 1:1 by Volume, Ideal for Casting 3D Silicone Molds| Food Molds, Jade Green Our Recommendation
BBDINO Silicone Mold Making Kit, Super Elastic Mold Making Silicone Rubber, Liquid Silicone for Mold Making, N.W. 21.16 oz, 1:1 by Volume, Ideal for Casting 3D Silicone Molds| Food Molds, Jade Green
4.5 (1277+ Reviews)
$19.59 Prime Eligible
GirlZone Little Choco Delights Maker Kit, Chocolate Making Kit with Candy Bar Molds, Lolly Sticks, Wrappers for Choco Bar, Gifts for 8+ Year Old Girls Our Recommendation
GirlZone Little Choco Delights Maker Kit, Chocolate Making Kit with Candy Bar Molds, Lolly Sticks, Wrappers for Choco Bar, Gifts for 8+ Year Old Girls
4.4 (37+ Reviews)
$24.90 Prime Eligible
3 Pieces Candy and Chocolate Silicone Molds Set Non-stick Including Heart, Round, Square Baking Mold for Hard Candy, Gummy, Hot Caramel, Ice, Cake, Jello, Ganache (Blue) Our Recommendation
3 Pieces Candy and Chocolate Silicone Molds Set Non-stick Including Heart, Round, Square Baking Mold for Hard Candy, Gummy, Hot Caramel, Ice, Cake, Jello, Ganache (Blue)
4.7 (202+ Reviews)
$9.89 Prime Eligible
Chocolate Molds Silicone - Set of 6 +Free Recipes eBook - Non-Stick Candy Molds Silicone - Food Grade Silicone Molds for Chocolate Candies Our Recommendation
Chocolate Molds Silicone - Set of 6 +Free Recipes eBook - Non-Stick Candy Molds Silicone - Food Grade Silicone Molds for Chocolate Candies
4.6 (5162+ Reviews)
$9.99 Prime Eligible
Cake Pop Making Kit,Including 100 Cake Pop Sticks 4 Inch Sucker Sticks,100 Cake Pop Bags with Twist Ties,Cake Pop Mold Scooper,Cake Pop Maker Tools for Cakepops,Lollipop,Candies,Chocolates and Cookies Our Recommendation
Cake Pop Making Kit,Including 100 Cake Pop Sticks 4 Inch Sucker Sticks,100 Cake Pop Bags with Twist Ties,Cake Pop Mold Scooper,Cake Pop Maker Tools for Cakepops,Lollipop,Candies,Chocolates and Cookies
3.9 (30+ Reviews)
$9.45 Prime Eligible
Chocolate Candy Molds-Food Grade Silicone+ Bonus E-Book Containing 592 Recipes. Non-stick, Easy to Use and Clean |Pack of 4 Chocolate Molds| CHOCOLEE Our Recommendation
Chocolate Candy Molds-Food Grade Silicone+ Bonus E-Book Containing 592 Recipes. Non-stick, Easy to Use and Clean |Pack of 4 Chocolate Molds| CHOCOLEE
4.2 (91+ Reviews)
$7.99 Prime Eligible
Letter Molds Alphabet Molds 5pcs Letter Number Heart Shape Flower Silicone Mold for Chocolate Fondant Polymer Clay Candy Gummy Cake Decorating Our Recommendation
Letter Molds Alphabet Molds 5pcs Letter Number Heart Shape Flower Silicone Mold for Chocolate Fondant Polymer Clay Candy Gummy Cake Decorating
4.4 (69+ Reviews)
$9.98 Prime Eligible
Hot Chocolate Bomb Molds,Large Hot Cocoa Bombs Silicone Hot Chocolate Bomb Mold Kit 2.5 inch Chocolate Bombs for Hot Cocoa Mold,Making Cake,Chocolate,Cocoa Bomb Mold Brush and Spatula Our Recommendation
Hot Chocolate Bomb Molds,Large Hot Cocoa Bombs Silicone Hot Chocolate Bomb Mold Kit 2.5 inch Chocolate Bombs for Hot Cocoa Mold,Making Cake,Chocolate,Cocoa Bomb Mold Brush and Spatula
4.5 (189+ Reviews)
$14.99 Prime Eligible
2PCS Rose Flowers silicone molds Cake Chocolate Mold wedding Cake Decorating Tools Fondant Sugarcraft Cake Molds Our Recommendation
2PCS Rose Flowers silicone molds Cake Chocolate Mold wedding Cake Decorating Tools Fondant Sugarcraft Cake Molds
4.3 (1466+ Reviews)
$4.99 Prime Eligible
Silicone Chocolate Candy Molds, Non-stick Animal Silicone Baking Mold Making Kit - BPA Free, Forest Theme with Different Animals, including Lion, Bear, Hippo, Butterfly and Flower, Set of 4 Our Recommendation
Silicone Chocolate Candy Molds, Non-stick Animal Silicone Baking Mold Making Kit - BPA Free, Forest Theme with Different Animals, including Lion, Bear, Hippo, Butterfly and Flower, Set of 4
4.5 (219+ Reviews)
$9.99 Prime Eligible
Webake Chocolate Candy Molds Silicone Baking Mold for Snack Size Peanut Butter Cup, Jello, Keto Fat Bombs and Cordial, Pack of 2 Our Recommendation
Webake Chocolate Candy Molds Silicone Baking Mold for Snack Size Peanut Butter Cup, Jello, Keto Fat Bombs and Cordial, Pack of 2
4.6 (2603+ Reviews)
$9.99 Prime Eligible
2 Pack Heart Silicone Molds Non-Stick Food Grade Silicone Molds Baking Mold Reusable Candy Mold,Used for Jelly, Homemade Treats, Candy, Chocolate,candle,lacquer seal Making Supplies Our Recommendation
2 Pack Heart Silicone Molds Non-Stick Food Grade Silicone Molds Baking Mold Reusable Candy Mold,Used for Jelly, Homemade Treats, Candy, Chocolate,candle,lacquer seal Making Supplies
4.2 (22+ Reviews)
$8.43 Prime Eligible
Annabel Kertzmann
Nutrition, Fitness, Cooking

Annabel Kertzmann is a renowned nutritionist with a specific focus on the health advantages of chocolate. With a firm belief in the nutritional potential of dark chocolate, she passionately dispels misconceptions surrounding it. Her articles combine scientific evidence with easy-to-understand information, providing readers with a comprehensive understanding of the subject.

Post a comment

0 comments